Building a simple login form in React Native using React Hook Form
Last updated 10 October 2021
In this article, I will give a short step-by-step tutorial about how to build a simple login form in React Native using React Hook Form – a performant, flexible and extensible form library with easy-to-use validation for React applications.
In this tutorial, I will use Expo managed workflow. Expo is a framework and a platform for universal React applications. It is a set of tools and services built around React Native and native platforms that help you develop, build, deploy, and quickly iterate on iOS, Android, and web apps from the same JavaScript/TypeScript codebase.
To create a new Expo project, you need to have Expo CLI installed. Run the command below in your terminal to install Expo CLI.
npm install -g expo-cliNow, you are ready to create your Expo project. To create a new project, run the following command in your terminal. You can name your app whatever you want. Also, select blank (TypeScript) managed workflow as a starting point.
expo initThis command will create a new Expo project in TypeScript. Open your newly created Expo project in your favourite code editor, and we will start building our login form.
Open App.tsx and replace the content with the following code.
import React from 'react';
import {StyleSheet, View} from 'react-native';

function useStyles() {
  return StyleSheet.create({
    root: {
      backgroundColor: '#000000',
      flex: 1,
    },
  });
}

const App: React.FC = () => {
  const styles = useStyles();

  return <View style={styles.root}></View>;
};

export default App;
Try to run your app by running expo start in your terminal. You can test your app using Android/iOS simulator or your real device. If you want to run the app from your real device, you need to install Expo Client. You can download the Expo Client from Play Store or App Store. At this point, you will only see a blank black screen.
To use React Hook Form, you need to add it into your project dependencies. In Expo managed workflow, you can install dependencies by running expo install <dependency>. Run the following command to install React Hook Form.
expo install react-hook-formThis command will add react-hook-form into your project dependencies. You can verify this by opening your package.json. You will notice that react-hook-form is listed in your project dependencies.
"dependencies": {
  ...
  "react-hook-form": "^6.9.0",
  ...
}
Without further due, let's start building the user interface. In this tutorial, I will only apply some basic stylings using StyleSheet. However, feel free to come up with your own design. I am pretty sure you can do better than me. Also, there are many UI libraries that you can use to build the user interface, such as React Native Paper, Native Base, UI Kitten, etc.
If you decided to start with my design, update your useStyles function with the following code.
function useStyles() {
  return StyleSheet.create({
    button: {
      alignItems: 'center',
      backgroundColor: 'rgb(93, 95, 222)',
      borderRadius: 8,
      height: 48,
      justifyContent: 'center',
    },
    buttonTitle: {
      color: '#FFFFFF',
      fontSize: 17,
      fontWeight: '600',
      lineHeight: 22,
    },
    content: {
      flex: 1,
      justifyContent: 'center',
      paddingHorizontal: 16,
      paddingVertical: 32,
    },
    forgotPasswordContainer: {
      alignItems: 'flex-end',
    },
    form: {
      alignItems: 'center',
      backgroundColor: 'rgb(58, 58, 60)',
      borderRadius: 8,
      flexDirection: 'row',
      height: 48,
      paddingHorizontal: 16,
    },
    label: {
      color: 'rgba(235, 235, 245, 0.6)',
      fontSize: 15,
      fontWeight: '400',
      lineHeight: 20,
      width: 80,
    },
    root: {
      backgroundColor: '#000000',
      flex: 1,
    },
    safeAreaView: {
      flex: 1,
    },
    subtitle: {
      color: 'rgba(235, 235, 245, 0.6)',
      fontSize: 17,
      fontWeight: '400',
      lineHeight: 22,
    },
    textButton: {
      color: '#FFFFFF',
      fontSize: 15,
      fontWeight: '400',
      lineHeight: 20,
    },
    textInput: {
      color: '#FFFFFF',
      flex: 1,
    },
    title: {
      color: '#FFFFFF',
      fontSize: 28,
      fontWeight: '700',
      lineHeight: 34,
    },
  });
}
If you have a web development background, you will realise that the code above looks similar to CSS. With React Native, you style your application using JavaScript. All of the core components accept a prop named style. The style names and values usually match how CSS works on the web, except names are written using camel casing, e.g. backgroundColor rather than background-color.
Before we start building the login form, I would like to create a custom helper component called SizedBox. Basically, this component is only a View which will work as a separator. If you are coming from Flutter, this component is similar to SizedBox widget in Flutter.
To create a custom component, you need to create a new file src/components/SizedBox.tsx and write the following code.
import React from 'react';
import { View } from 'react-native';

interface Props {
  height?: number;
  width?: number;
}

const SizedBox: React.FC<Props> = ({ height, width }) => {
  return <View style={{ height, width }} />;
};

export default SizedBox;
Next, update the import statements on App.tsx to import the required components to build our login form. Update your import statements with the following code.
import React from 'react';
import {
  Alert,
  KeyboardAvoidingView,
  Platform,
  Pressable,
  SafeAreaView,
  StyleSheet,
  Text,
  TextInput,
  TouchableOpacity,
  View,
} from 'react-native';
// Components
import SizedBox from './src/components/SizedBox';
Next, update your App component with the following code.
const App: React.FC = () => {
const styles = useStyles();
return (
<View style={styles.root}>
<SafeAreaView style={styles.safeAreaView}>
<KeyboardAvoidingView
behavior={Platform.OS === 'ios' ? 'padding' : 'height'}
style={styles.content}
>
<Text style={styles.title}>Welcome back!</Text>
<SizedBox height={8} />
<Text style={styles.subtitle}>Sign in to your account</Text>
<SizedBox height={32} />
<Pressable>
<View style={styles.form}>
<Text style={styles.label}>Email</Text>
<TextInput
autoCapitalize="none"
autoCompleteType="email"
autoCorrect={false}
keyboardType="email-address"
returnKeyType="next"
style={styles.textInput}
textContentType="username"
/>
</View>
</Pressable>
<SizedBox height={16} />
<Pressable>
<View style={styles.form}>
<Text style={styles.label}>Password</Text>
<TextInput
autoCapitalize="none"
autoCompleteType="password"
autoCorrect={false}
returnKeyType="done"
secureTextEntry
style={styles.textInput}
textContentType="password"
/>
</View>
</Pressable>
<SizedBox height={16} />
<View style={styles.forgotPasswordContainer}>
<Text style={styles.textButton}>Forgot password?</Text>
</View>
<SizedBox height={16} />
<TouchableOpacity>
<View style={styles.button}>
<Text style={styles.buttonTitle}>Continue</Text>
</View>
</TouchableOpacity>
</KeyboardAvoidingView>
</SafeAreaView>
</View>
);
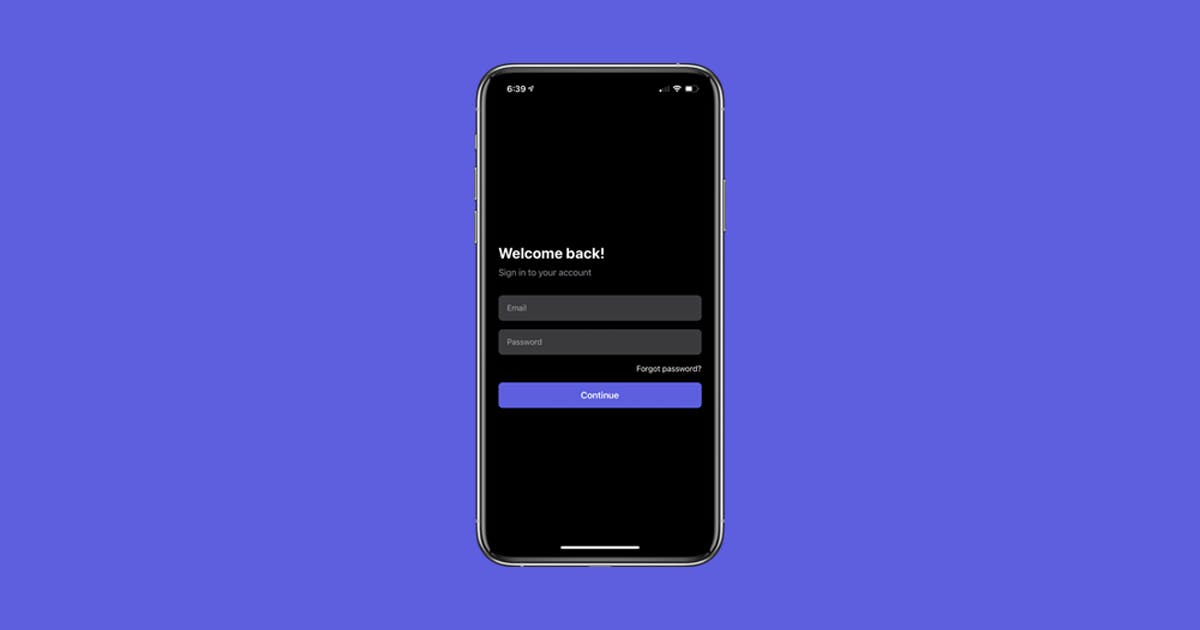
};If you already have your app running, you can save your file, and you will see a simple login form in your device's screen. At this point, you can interact with the form. However, there is no functionality implemented yet. In the next step, we will start integrating React Hook Form into our login screen.
Add the following code below your react-native import statement to import the required module to implement React Hook Form.
// Modules
import { Controller, useForm } from 'react-hook-form';
Next, add the following code below your import statements. React Hook Form is built with Typescript, so you can define a FormData type to support form values.
interface FormData {
  email: string;
  password: string;
}
Next, add the following code inside your App component.
const App: React.FC = () => {
  const { control, handleSubmit } = useForm<FormData>({
    defaultValues: {
      email: '',
      password: '',
    },
  });

  const onSubmit = handleSubmit(({ email, password }) => {
    Alert.alert('Data', `Email: ${email}\nPassword: ${password}`);
  });

  ...

  return (
    ...
  );
};
Next, update your email and password text input with the following code.
...
<Controller
  control={control}
  name="email"
  render={({ onBlur, onChange, value }) => (
    <TextInput
      autoCapitalize="none"
      autoCompleteType="email"
      autoCorrect={false}
      keyboardType="email-address"
      onBlur={onBlur}
      onChangeText={onChange}
      returnKeyType="next"
      style={styles.textInput}
      textContentType="username"
      value={value}
    />
  )}
/>
...
<Controller
  control={control}
  name="password"
  render={({ onBlur, onChange, value }) => (
    <TextInput
      autoCapitalize="none"
      autoCompleteType="password"
      autoCorrect={false}
      onBlur={onBlur}
      onChangeText={onChange}
      onSubmitEditing={onSubmit}
      returnKeyType="done"
      secureTextEntry
      style={styles.textInput}
      textContentType="password"
      value={value}
    />
  )}
/>
...
Next, update your login button to handle submit event.
...
<TouchableOpacity onPress={onSubmit}>
  <View style={styles.button}>
    <Text style={styles.buttonTitle}>Continue</Text>
  </View>
</TouchableOpacity>
...
Next, save your file and try to run your app. Now, you can enter your email and password and press the button. You will see an Alert displaying your email and password. If you realise, the form is not quite user friendly yet. For example, when you press next after you enter your email address, the keyboard will disappear and the password field is not focused. To address this issue, you need to do a little bit of work. You need to attach ref into your text field components. Then, you can call .focus() function to programmatically focus on a particular text input. Update your App.tsx with the following code.
import React from 'react';
import {
  Alert,
  Keyboard,
  KeyboardAvoidingView,
  Platform,
  Pressable,
  SafeAreaView,
  StyleSheet,
  Text,
  TextInput,
  TouchableOpacity,
  TouchableWithoutFeedback,
  View,
} from 'react-native';
// Modules
import { Controller, useForm } from 'react-hook-form';
// Components
import SizedBox from './src/components/SizedBox';

interface FormData {
  email: string;
  password: string;
}

function useStyles() {
  return StyleSheet.create({
    button: {
      alignItems: 'center',
      backgroundColor: 'rgb(93, 95, 222)',
      borderRadius: 8,
      height: 48,
      justifyContent: 'center',
    },
    buttonTitle: {
      color: '#FFFFFF',
      fontSize: 17,
      fontWeight: '600',
      lineHeight: 22,
    },
    content: {
      flex: 1,
      justifyContent: 'center',
      paddingHorizontal: 16,
      paddingVertical: 32,
    },
    forgotPasswordContainer: {
      alignItems: 'flex-end',
    },
    form: {
      alignItems: 'center',
      backgroundColor: 'rgb(58, 58, 60)',
      borderRadius: 8,
      flexDirection: 'row',
      height: 48,
      paddingHorizontal: 16,
    },
    label: {
      color: 'rgba(235, 235, 245, 0.6)',
      fontSize: 15,
      fontWeight: '400',
      lineHeight: 20,
      width: 80,
    },
    root: {
      backgroundColor: '#000000',
      flex: 1,
    },
    safeAreaView: {
      flex: 1,
    },
    subtitle: {
      color: 'rgba(235, 235, 245, 0.6)',
      fontSize: 17,
      fontWeight: '400',
      lineHeight: 22,
    },
    textButton: {
      color: '#FFFFFF',
      fontSize: 15,
      fontWeight: '400',
      lineHeight: 20,
    },
    textInput: {
      color: '#FFFFFF',
      flex: 1,
    },
    title: {
      color: '#FFFFFF',
      fontSize: 28,
      fontWeight: '700',
      lineHeight: 34,
    },
  });
}

const App: React.FC = () => {
  const emailInput = React.useRef<TextInput>(null);
  const passwordInput = React.useRef<TextInput>(null);

  const { control, handleSubmit } = useForm<FormData>({
    defaultValues: {
      email: '',
      password: '',
    },
  });

  const onSubmit = handleSubmit(({ email, password }) => {
    Alert.alert('Data', `Email: ${email}\nPassword: ${password}`);
  });

  const styles = useStyles();

  return (
    <TouchableWithoutFeedback onPress={Keyboard.dismiss}>
      <View style={styles.root}>
        <SafeAreaView style={styles.safeAreaView}>
          <KeyboardAvoidingView
            behavior={Platform.OS === 'ios' ? 'padding' : 'height'}
            style={styles.content}
          >
            <Text style={styles.title}>Welcome back!</Text>

            <SizedBox height={8} />

            <Text style={styles.subtitle}>Sign in to your account</Text>

            <SizedBox height={32} />

            <Pressable onPress={() => emailInput.current?.focus()}>
              <View style={styles.form}>
                <Text style={styles.label}>Email</Text>

                <Controller
                  control={control}
                  name="email"
                  render={({ onBlur, onChange, value }) => (
                    <TextInput
                      autoCapitalize="none"
                      autoCompleteType="email"
                      autoCorrect={false}
                      keyboardType="email-address"
                      onBlur={onBlur}
                      onChangeText={onChange}
                      onSubmitEditing={() => passwordInput.current?.focus()}
                      ref={emailInput}
                      returnKeyType="next"
                      style={styles.textInput}
                      textContentType="username"
                      value={value}
                    />
                  )}
                />
              </View>
            </Pressable>

            <SizedBox height={16} />

            <Pressable onPress={() => passwordInput.current?.focus()}>
              <View style={styles.form}>
                <Text style={styles.label}>Password</Text>

                <Controller
                  control={control}
                  name="password"
                  render={({ onBlur, onChange, value }) => (
                    <TextInput
                      autoCapitalize="none"
                      autoCompleteType="password"
                      autoCorrect={false}
                      onBlur={onBlur}
                      onChangeText={onChange}
                      onSubmitEditing={onSubmit}
                      ref={passwordInput}
                      returnKeyType="done"
                      secureTextEntry
                      style={styles.textInput}
                      textContentType="password"
                      value={value}
                    />
                  )}
                />
              </View>
            </Pressable>

            <SizedBox height={16} />

            <View style={styles.forgotPasswordContainer}>
              <Text style={styles.textButton}>Forgot password?</Text>
            </View>

            <SizedBox height={16} />

            <TouchableOpacity onPress={onSubmit}>
              <View style={styles.button}>
                <Text style={styles.buttonTitle}>Continue</Text>
              </View>
            </TouchableOpacity>
          </KeyboardAvoidingView>
        </SafeAreaView>
      </View>
    </TouchableWithoutFeedback>
  );
};

export default App;
Next, save your file and try to run your application. At this stage, you will have a fully working login form implemented using React Hook Form. If you want to learn more about React Hook Form and Expo, you can visit their official website below.